Deploying a Node App to DigitalOcean
Making use of DO cloud servers, git, nginx, and forever.js to get a node app up and running!
DISCLAIMER: This is my first article. I’ve been doing web development professionally for three years, and it seemed like a great time to branch out and show a few really cool things I’ve been working on. Here goes!
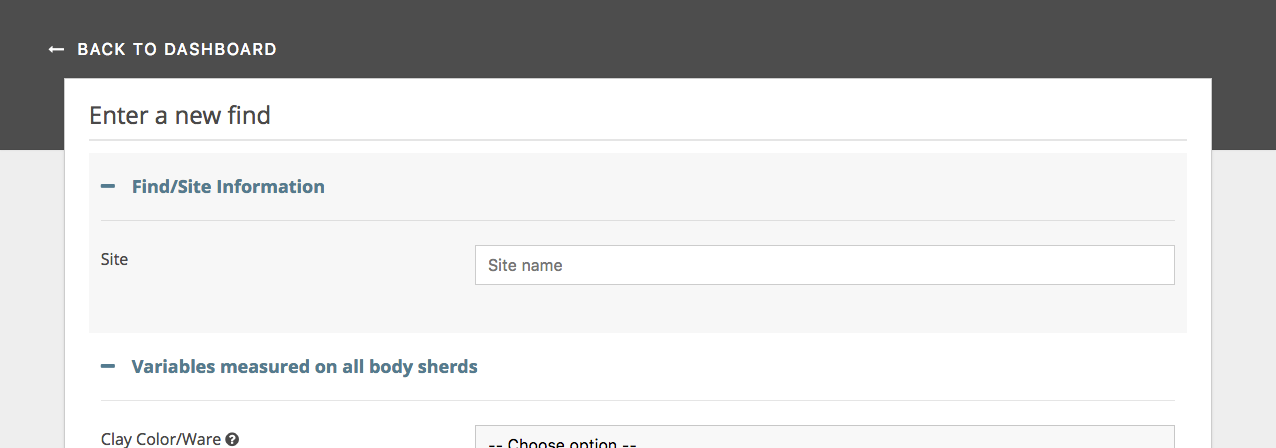
Acoma Data Collection New Find Interface
Overview
In this article I will walk you through how to take a completed node application (I will be using my recently completed Acoma data collection app in this example) and deploy it to a DigitalOcean (DO) cloud server. There is surprisingly minimal documentation on deploying Node apps, but DO makes it very easy.
There are a few assumptions made when writing this:
You have a locally functioning Node application (mine is MySQL-Express-Angular-Node, or MyEAN). By functioning, I mean it runs on localhost.
Your application uses git, or you are familiar with using an FTP client to get your files onto the server. I definitely recommend Github though.
You have a basic understanding of (or at least a desire to learn) SSH and the command line, and a machine that allows you to use ssh.
You have at least $5 for a month of hosting.
Why DigitalOcean?
At the beginning, my sole reason for considering DO was because I was starting a new job at an IaaS company, and I realized I knew very little about cloud computing. After looking into my current portfolio website’s hosting and realizing they didn’t even support node apps yet, it wasn’t a hard decision.
What’s cool about DO is the customization of the environment, and the simple and easy to use interface. A DO cloud server is referred to as a “droplet”, and when setting up a new droplet, you can choose the Linux distribution, the storage size, datacenter regions, and more, based on your needs. I’m aware this sounds like a DigitalOcean advertisement, but I swear it’s awesome.
Account and Droplet Setup
The basic account set up is very simple. Visit https://www.digitalocean.com and create an account. You may need to wait a few hours until your account is validated if you choose not to link your account with Google or Github.
Note: If you’re a student and use Github, sign up for the free Github Student Developer Pack, and get $100 credit to apply to your DO account.
After you have your account set up following DO’s set up instructions, you should be on the droplets tab, where it will state that you have no droplets made yet. Click the big green “Create Droplet” button and begin!

There are two ways you can go from here: choose a distribution, or choose a one-click app. The one-click-app is a handy way of configuring an environment with pre-installed dependencies. In this case, we’d want to use the NodeJS option. There are a few you can choose from. You’re probably safe just choosing the latest version, unless you have a specific reason not to.

One-click-app options (as of the time of writing)
Note: There are a few reasons why you might want to use a basic distribution instead of a one-click app. Many clients are familiar with cPanel, and since there is some consensus that cPanel works best on CentOS, that might be your best option.
Next, you’ll want to figure out the size of your server. If it’s a small application, or you’re setting it up as a test droplet for this tutorial, you are probably fine with the cheapest option ($5/month). You can always upgrade later if you find it’s not enough.

Droplet pricing by storage size
Note: If you’ve chosen a one-click app with a CMS like Wordpress, you are required to choose a minimum of $10, because the dependencies take up a large amount of space.
You will need to SSH into your droplet in order to clone down the application and access your environment. To do this, you’ll need to set up SSH keys. (DO provides a guide for how to do this here). Once it’s created, you can select it from the list.
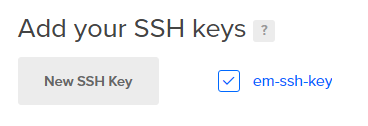
My key is named “em-ssh-key” for this tutorial.
Finally, you can edit the hostname of the droplet if you’d like. It’s good to make it something descriptive, in case you make multiple droplets. Hit create!
It’ll make your droplet fairly quickly, and when it’s done, it should look something like this:

From here, you can make changes, share it, delete it, etc.
Accessing your freshly minted Droplet
Next, we want to actually be able to access the droplet. There is a built in DO web console that you can use under “More”, but for now, I am going to use the command line.
Note: All typed terminal commands are denoted by a “$”.
Assuming that your key is set up correctly, you should be ready to access your droplet with SSH. If you aren’t able to, revisit the SSH article. Step 4 shows how to add a key to an existing droplet.
From your command line, you can log in using the username (root by default), and the IP address of your droplet. The IP is found in your list of droplets on the DO website (see previous step).
$ ssh root@[your.ip.address.here]
When it prompts you to confirm that you want to connect, type “yes”. You should now be in the home directory of your droplet.
Cloning your project
The easiest way to get your application onto the droplet is to clone it in using git. Git is included as part of the Node.js one-click app set up. If you don’t want to use git and you know how to move files using a FTP client, feel free to skip this step and do it your way.
If your project isn’t currently on Github and you’d like to put it there to complete this section, here are the steps.
To clone your project:
$ git clone <your.project.link>
If you’re using Github, you can find the link by going to your project, and clicking the Clone or download button. Type or paste it into the clone command.
These next steps will probably vary by project. Your end goal is to have your application up and running on localhost (in your droplet), exactly like you had it on your local machine, including installing any dependencies needed. I used node package manager (npm) for my application, so my steps look like this:
$ ls
$ cd <your_app_folder>
$ npm install
Once you’ve finished your individual setup steps, you can start your node server. You can keep the same server.js (or index.js) file that you used on your local machine. Just remember the port number you’re using. To start, run the same command you used locally. Mine is:
$ node server
Starting server at port 8080...
Congrats, you (hopefully) have your app running on your server!
Installing nginx and configuring the proxy
The minute you create your droplet, you are able to access it via the IP address. If you try hitting your IP in the browser, although you might expect to see your application running, you won’t.
Why? JavaScript is a client-side scripting language. It runs in a browser and isn’t traditionally used on the server. It is currently running on your localhost, but you can’t access this publicly yet. To do this, we’ll be using nginx (engine-x) as a reverse proxy. Basically, when you try to hit your droplet IP address, nginx will retrieve the app’s files being served from localhost and forward them to the user in the browser.

DigitalOcean already thoroughly documents this process here, if you are unfamiliar. I won’t repeat what they’ve already said, so just follow the installation steps there. At the end of the steps on that list, you should be viewing the nginx page to the left in your browser when you try to hit your application.
The next step is to modify the proxy_pass so that nginx knows to use your application. This can be found here at /etc/nginx/sites-available/default on your droplet. Modify it like this:
$ vi /etc/nginx/sites-available/default
If you’re unfamiliar with (or hate) vi, you can use your favorite screen-oriented text editor instead. Once the file is open for editing, use these vi commands to make the changes.
$ i
After typing “i”, you’ll be in Vi’s edit mode. Scroll down until you find a block called location. It should look something like this:
location / {
 # First attempt to serve request as file, then
 # as directory, then fall back to displaying a 404.
 try_files $uri $uri/ =404;
 }
Replace that block with this:
location / {
                # First attempt to serve request as file, then
                # as directory, then fall back to displaying a 404.
                proxy_pass [http://localhost:8080](http://localhost:8080);
                proxy_http_version 1.1;
                proxy_set_header Upgrade $http_upgrade;
                proxy_set_header Connection 'upgrade';
                proxy_set_header Host $host;
                proxy_cache_bypass $http_upgrade;
        }
If you’ve set up your app to run on a port other than 8080, you’ll need to update that on the proxy_pass line.
To save and exit the text editor, simple hit the ESC key, and then:
$ :wq
Finally, test and then restart your nginx server by typing:
$ sudo nginx -t
$ sudo systemctl restart nginx
DigitalOcean has a more comprehensive overview of updating nginx default file here, including configuring multiple applications on the same droplet.
Starting your node app…forever
If your app isn’t already running on localhost:8080 (or whichever port you’re using) from the earlier step, go and do that.
$ node server
Try hitting your IP address again. The nginx splash page should be replaced with your application! Congratulations on making it this far, but we’re not done yet.
Simply typing node server and having your app run works great in development when you’re constantly starting and stopping it as part of development. In a production environment, you don’t want this to stop running, ever. If it does, you’ll want it to come back up immediately. Currently, if your instance stops running, you’d need to log back into your droplet and start it again. Luckily, there’s an npm tool called **forever.js **that guarantees your script will continue running.
$ sudo npm install forever -g
There are multiple ways to configure this, depending on your application. I recommend reading the forever.js README to learn more.
The most simple way to get your application up and running forever is to type the following (make sure you’ve quit your earlier node instance running):
$ forever start server.js
warn:    --minUptime not set. Defaulting to: 1000ms
warn:    --spinSleepTime not set. Your script will exit if it does not stay up for at least 1000ms
info:    Forever processing file: server.js
You should get a message saying that forever is processing your server.js file. To confirm, type:
$ forever list
info:    Forever processes running
data:        uid  command         script    forever pid   id logfile                 uptime
data:    [0] wJf2 /usr/bin/nodejs server.js 12552   12558    /root/.forever/wJf2.log 0:0:1:0.35
You should see your process listed. To stop a specific process, type :
$ forever stop server.js
To stop all processes, type:
$ forever stopall
Go back to your application, refresh, and make sure you can still see it. If you do, then you’re done! Your application can be hit anywhere at that IP address. If your node quits on you, forever will restart it for you.
Possible Next Steps
Buy a domain and register your IP with DNS so that you can access your site without needing to type in the IP.
Set up a database (article coming soon) on your droplet
As you make updates to your application, ssh into your droplet, pull down the changes, and make sure to stop your server.js process and restart it so the new changes take effect.
Share the article!
Conclusion
Like I said at the beginning, this is my first technical article. I’d love any constructive feedback. Was the article hard to understand? Too verbose? Any inaccuracies? I am going to be writing some more soon, specifically about building dynamic Angular forms driven by JSON, Node-MySql backends, and building offline capable data-driven apps. Stay tuned!